When to use this
Replace the Ethernet port if it is damaged or causing connectivity issues.
Steps
-
Disconnect the internal Ethernet cable from the port assembly and move it out of the way.
-
Remove the two mounting screws securing the Ethernet port assembly. Keep both screws for reinstallation.
-
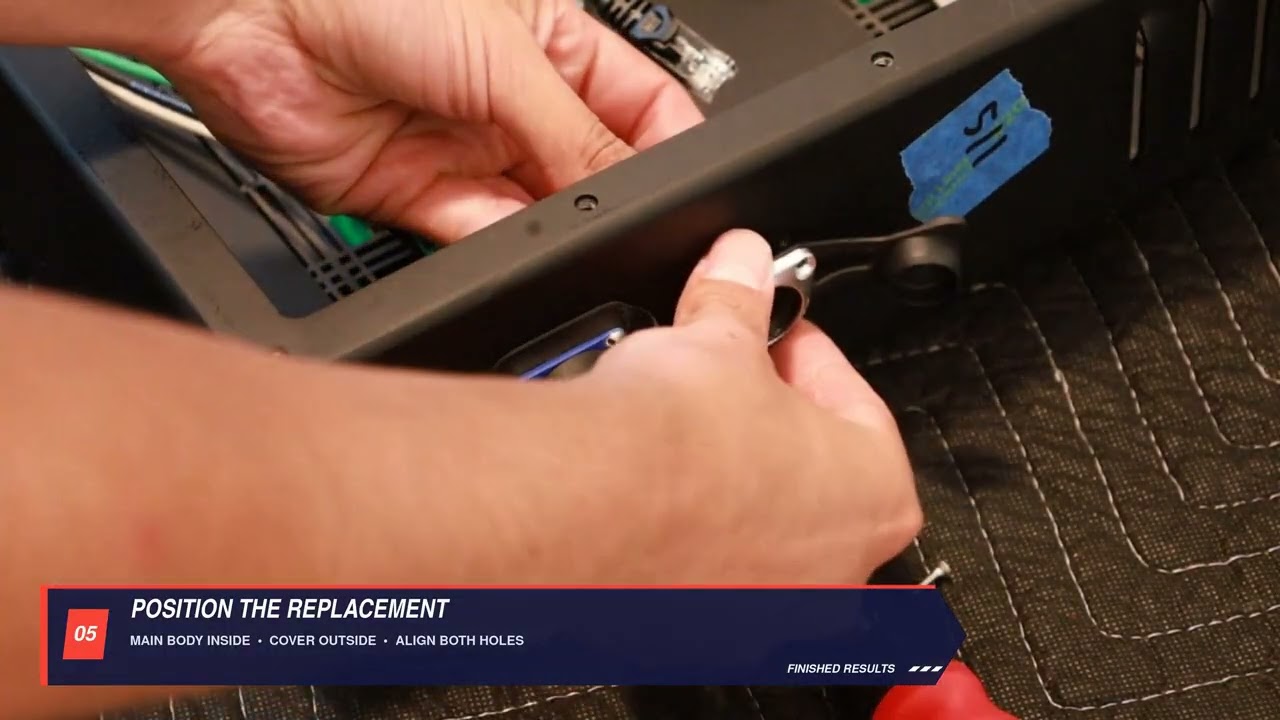
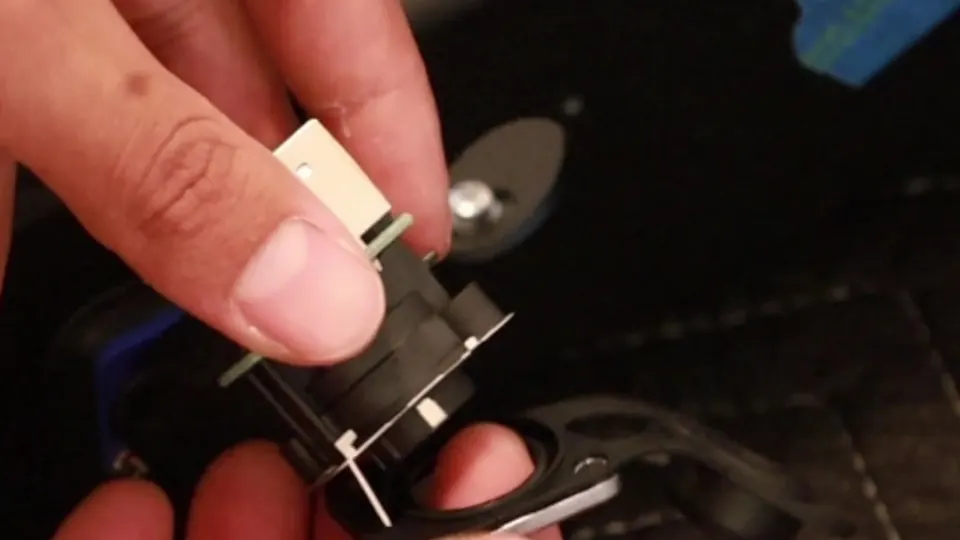
Remove the port assembly. Identify the larger main body, which fits inside the clock, and the outer cover, which fits outside.
-
Align the small metal tab on the main body with the matching feature in the outer cover. Check that the pieces fit together correctly.
Match the body and outer cover -
Position the replacement main body inside the clock and the outer cover outside. Align both mounting holes.
-
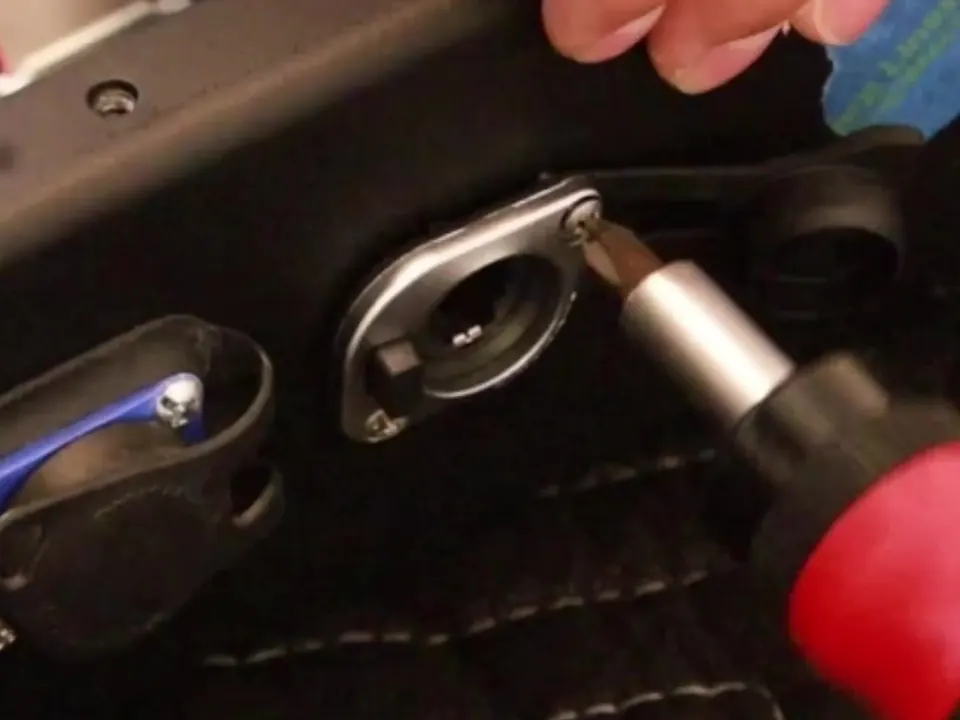
With both pieces and the screw holes aligned, reinstall and tighten the two mounting screws.
Reinstall both mounting screws -
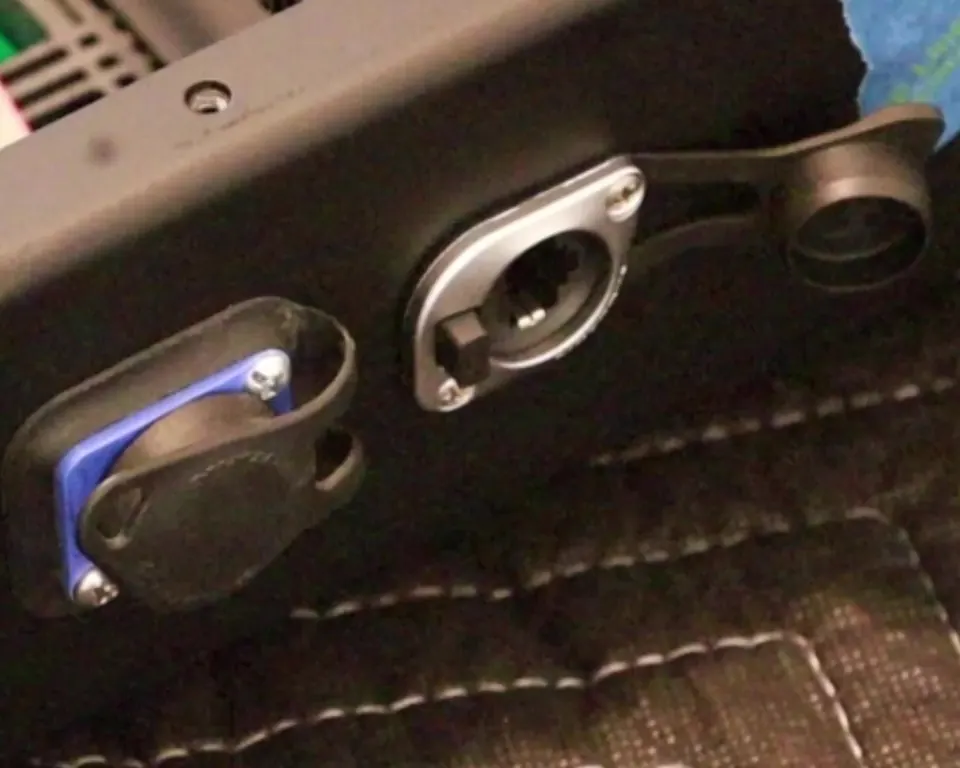
Reconnect the internal Ethernet cable to the port assembly. Check that the connector is fully seated.
Installed Ethernet port assembly
Important
- Main body inside; outer cover outside.
- Match the metal tab before tightening.
- Retain and reinstall both mounting screws.
Check when done
Both screws are installed and the internal cable is fully seated. If the issue continues, contact Finished Results Support.
Still not working?
Email support@finishedresults.com. Tell us you completed procedure 12 and what you saw when you checked your work. Replacement parts are ordered the same way.