When to use this
For a Pi power cable that is damaged or is not supplying power to the Raspberry Pi.
Steps
-
At the Pi HAT, loosen the two terminal screws and release the red and black cable ends.
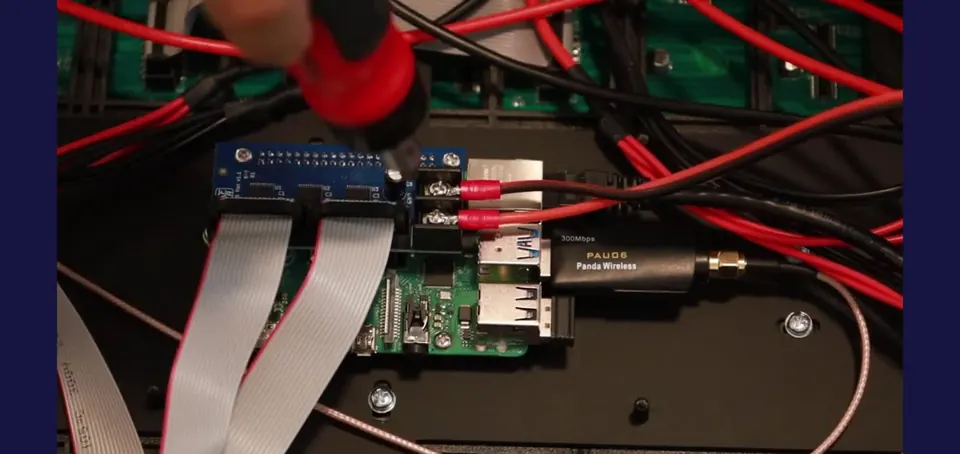
Disconnect at the Pi HAT -
Trace the same cable to the power supply and confirm that you have identified the correct wire pair.
-
Loosen the corresponding power-supply terminal screws and remove the old cable.
-
At the power supply, connect the replacement red lead to positive and the black lead to negative, using the terminal markings shown.
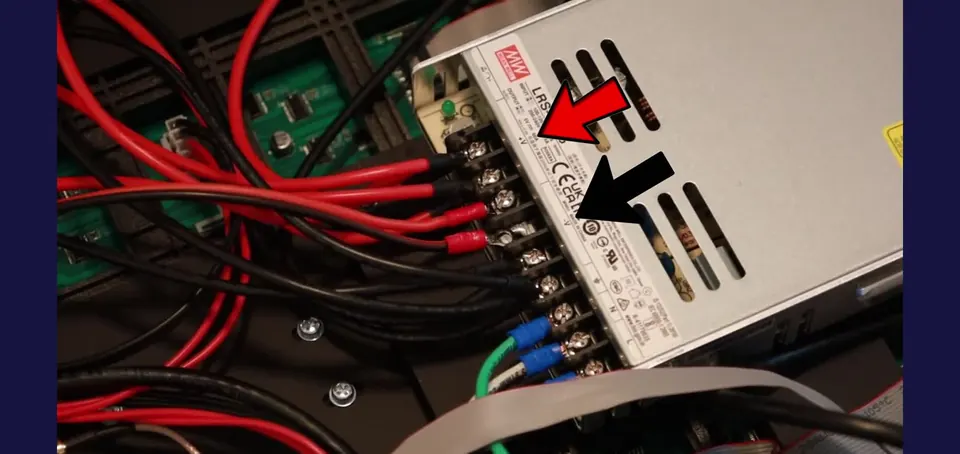
Match supply polarity -
Position the replacement cable ends at the matching connections and tighten the screws.
-
Return any displaced LED power-cable ends to their original power-supply positions.
-
Position the cable ends beneath the loosened screws, then secure the red cable ends and the black cable ends.
-
Return to the Pi HAT. Connect the red power cable to the terminal labeled +5V.
Step 08: Pi HAT power connections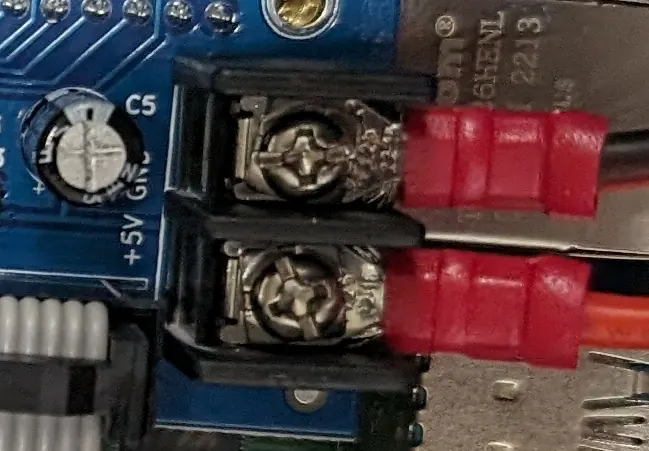
Pi HAT power terminals - Black cable top terminal screw
- Red cable +5V
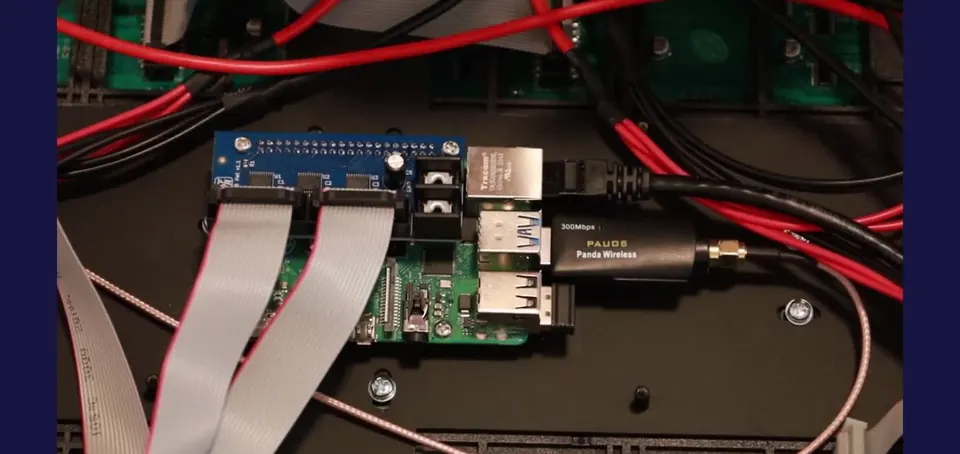
Red lower; black upper -
Connect the black power cable to the other terminal screw directly above it. Tighten both terminal screws.
Important
- Confirm the cable pair before disconnecting it.
- Power supply: red to positive; black to negative.
- Pi HAT: red lower; black upper.
Check when done
All replacement and restored cable ends are secured at their original terminals, with correct polarity at both the power supply and the Pi HAT.
Still not working?
Email support@finishedresults.com. Tell us you completed procedure 07 and what you saw when you checked your work. Replacement parts are ordered the same way.