When to use this
Replace the Raspberry Pi if it is damaged or is not powering on.
Steps
-
Remove the two screws that secure the Pi HAT.
-
Keep the Pi HAT ribbon cables connected and carefully move the Pi HAT aside.
-
Disconnect the Ethernet cable from the top port on the right side of the Raspberry Pi.
-
Remove the small USB receiver, followed by the Panda wireless adapter. Grip each connector at its base.
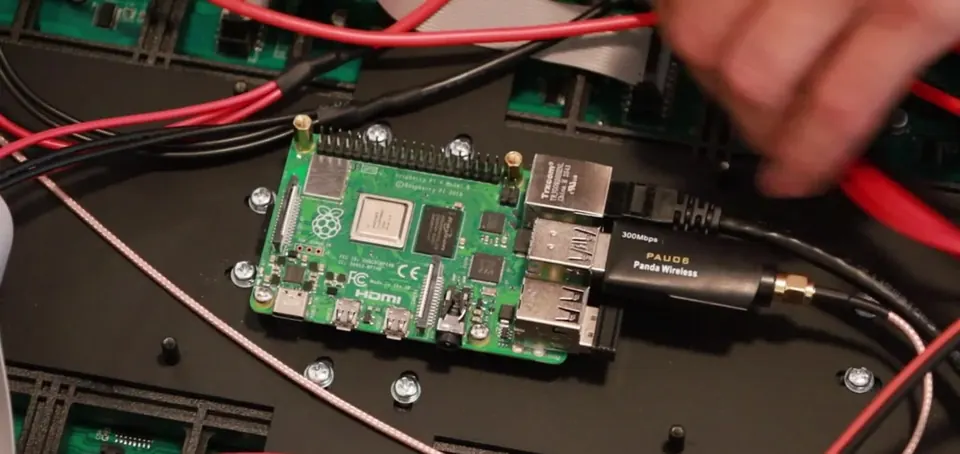
Disconnect right-side devices -
Remove the mounting screws and threaded standoffs at the four Raspberry Pi mounting points.
-
Lift the original Raspberry Pi away from the mounting points.
-
Position the replacement over the same four points. The 40-pin header faces the upper edge of the clock.
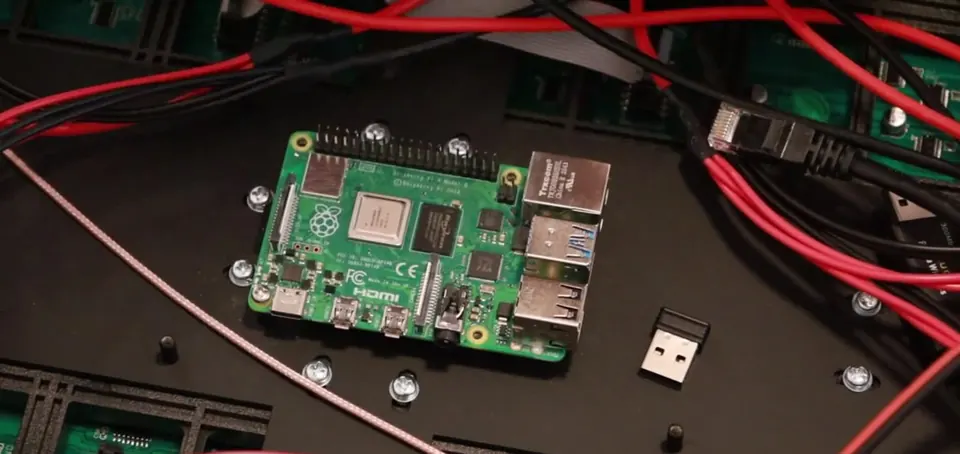
Match the 40-pin-header orientation -
Align all four holes before installing any hardware.
-
Reinstall the screws and threaded standoffs. Start each piece by hand, then tighten. Keep the board flat and do not overtighten.
-
Reconnect the Ethernet cable, small USB receiver, and Panda wireless adapter to their original right-side ports.
-
Return the Pi HAT to its original position and reinstall its two screws.
Important
- Four Raspberry Pi mounting points.
- 40-pin header faces the upper edge of the clock.
- Grip connectors at their bases.
Check when done
The Raspberry Pi sits flat, all four mounting points are secure, each connector is fully seated in its original port, and the Pi HAT is restored.
Still not working?
Email support@finishedresults.com. Tell us you completed procedure 08 and what you saw when you checked your work. Replacement parts are ordered the same way.